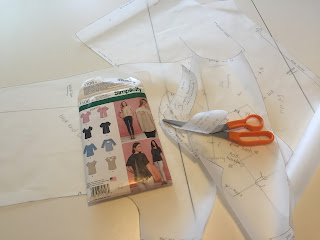
Ooh boy am I excited! I made my first piece of clothing for myself!!! My mom and I have a bunch of uncut patterns at home, so I chose one that looked like it was simple but something that I would actually wear. The pick:
A nice flowy blouse with either a back inset or contrast back. I decided to go with view A which has a back inset and sleeve opening detail (a hole, basically. But a nice hole). Off to the fabric store I went!!
Living in Hawaii, my fabric choices are somewhat more limited than those who live in the big cities (I'm so jealous of MOOD. Seriously). What I ended up with was a some kind of drapey rayon fabric
I'm not sure what it is exactly, but it's really pretty! Anyway, super excited I went home and traced the pattern in a medium.
I went to lay out the pattern pieces on the fabric like the instructions said and lo and behold, it didn't fit!
Much sad. So sad. Turns out, I thought the fabric was 60" width but it was 45". Boo. What a bummer. So I ran back out to the fabric store, had a mini heart attack because I couldn't find the same fabric and had to be patient while my new bit of fabric went for a spin in the washer.
But, hey! It was worth the wait. The instructions were easy to follow, even though I had to look up a couple of things (understitching? stay-stitching? Now I know what they are).
These two pics are of the blouse before I sewed up the side seams. Looks a little big, no? Also I love pockets so even though view A doesn't have one, I used the pocket from view B. Not difficult.
I sewed up the side seams, and yes, the blouse was in fact a bit large on me. I decided to take up the shoulder 1", the hem up 1 1/2", and the side seams about 1/2" on each side. Doing this after I had sewn all of this was a pain (next time, muslin first! but probably not because I'm lazy and too excited to make something wearable from the get-go) especially the shoulder holes. However, the result is something I'm so proud to wear!
See? Much better. I also had to move the pocket since I took in the sides.
Here's some slightly better pictures of the completed blouse.
The shoulder hole things. There's gotta be a name for these. I actually just noticed that my fabric looks a lot like the drawing on the pattern envelope. Huh.
Some of the things I learned making this blouse:
- Stay-stitching is basically stitiching right inside the seam allowance to strengthen the fabric in that area (used on the neckline)
- Understitching is to keep the facing from rolling to the front. Very important because that would be so annoying. You just sew the facing to the facing+neckline seam allowance after trimming and cutting whatever notches needed
- Chiffon frays like a bitch. finish the edges before working with it. That would make it so much easier


